I guess we could consider ourselves lucky, Soulmate, our 30 year old Cal 25, had a firm deck, good standing rigging, and her center bulkhead was fine. She had a new mainsail, stainless steel sink and a #1 genoa and #2 genoa that may last this season. Her boom and mast only required minor TLC. After several hours of cleaning, Soulmates' windows open and the dings on the metal frames shine and give her character. But the rest of her took lots of heart and soul, lots of long weekends and lots of hours after work. We ran over our budget of $5,000.00 but Soulmate is happy and proud to be back in the water. (It took 6 months for us to agree on the name of our boat. One evening Randy called me his soul mate. It touched my heart.) She recovered nicely from her face-lift. All the agony and time we encountered with her, repairing, cleaning and rebuilding, were worth it. We will enjoy her on the weekends and I do rest at night knowing she is happy on "Cuddy Way" rocking and swaying in the waters where she belongs.
The first time I saw her, Soulmate was nameless, up on a trailer in the middle of the dusty desert. She ventured there so that our neighbor could put his Sprinta Sport into the waters at Lake Mead. Four months later Randy and Steve built her a new trailer, hired a crane and proudly pulled her to our yard. She sat there for almost a year being drilled on, sanded on, climbed on and scrubbed on. What follows is our story, the tasks we tackled to get our first sailboat from the land to the sea. I lost track of the exact monies we spent a couple of weeks before we launched (This is usually a good idea- ed) . Things got a bit crazy and hectic with holidays, friends and anticipation of putting our boat in the water, but I will give you a breakdown of the major investments. Screws, nuts, bolts, washers, brushes, rags and sandpaper are a must that you can never have too much of. Our most valuable tool was a DeWault rotary sander, and by the end of this project we had purchased a second one. One also needs patience's and determination.
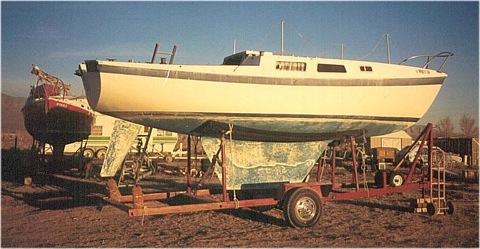
Soulmate as we found her
The first thing Randy got started on was the bottom. He chose to work with "The West System". It was by far the most intense and time-consuming repair of all. One could see hundreds of blisters, ranging in size from the bottom of a coke can to the end of a Bic pen. It took 6 weekends to sand the paint off the hull and keel. Smoothing and fairing out the bottom of a boat, that's not fair to begin with, is a thankless job and if we had sought perfection on the hull and keel of this Cal we'd still be working on her bottom today. However, you can get one into good shape with time and energy. Once the paint is off it's time to grid out the blisters, smooth them and get them ready for the process of epoxy, filling, sanding and repeating until the holes blended with the rest of the bottom.
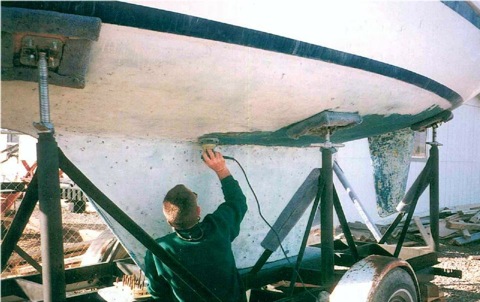
Note the blisters on the keel and rudder
Much to our surprise while grinding out a blister at the front of the keel a waterfall spouted. In shock Randy started drilling below the hole. Some 9-12 inches later he found the bottom level of the water and it drained from her the next 20-30-40 minutes.
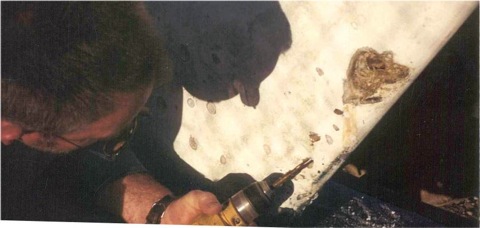
Water came from the keel stub.
It was during this time I started reading through the open forum on the Cal 25 web site. The site is full of great information. Water seeping form the keel has occurred on other boats, but we still don't know where Soulmate's water came from. The Epoxy process began after a couple of weeks of letting the keel dry out.
The front and bottom edges of this keel that were worn, jagged or just gone were re-shaped with a layering and sanding process. After the prep work was completed on the hull and keel the seal coat, which is a 2-part epoxy system of resin and hardener, was applied, sanded, reapplied, re-sanded and applied for the 3rd time. By now it is summertime. Our neighbor had his 23 ft Sprinta Sport back out of the water and you could see where the water washed away the paint from the front edge of the keel back 24-30 inches on each side, and from the thickest part of the keel back about 12-18 inches. The wear edges on the front of the keel and the widest parts of the sides of the keel have 4 coats of sealer. Four coats of waterproof filler were put on the entire bottom and then 5-6 coats of barrier. We selected Micron Extra Paint by Interlux to finish the bottom of the boat, which provides for indefinite boat launch time and contains biolux. Micron paint is extremely thick and not a slick smooth paint for a racer to use. It is recommended to brush or roll on in temperatures under 95 degrees. I cannot stress enough the frustration that occurs when applying this paint when it is dry and hot outside. The final coats of bottom paint, 4 overall with 6 coats in the heavy wear areas, were applied in the fall and went on much easier than the first two. Two gallons of paint at $169.00 a gallon brought the bottom job, including the Dewault sander to between $850.00 and $900.00.
The new bottom looking good
We had the boat up on 6 12" x 12" carpeted pads attached to jacks, 3 per side. You can work on the bottom in specific areas and are able to get up into the boat. I got ambitious and began to clean out the inside. The plush blue carpet left. The added bench seat, forward the sink, was set aside and when her inside was finally gutted I shook my head, pulled up my shirt -sleeves and started scrapping. I then sponge painted her front sleeping berth and put bright white interior semi gloss paint on her dingy faded ceiling, bulkheads, bathroom and storage area. Several weeks later she was clean to the stern and full of new life.
Using the old companionway rails for templates my father made us new ones out of red oak and we made the new companionway covers from ½" oak plywood. We elected to make wood hatch covers, one that slides under the other, rather than attempting to repair the pop-top fiberglass covers that were cracked and weak. The sides of the hatch covers are made out of 1 x 4's and 1 x 2's sanded and planed with rounded corners that are screwed and glued to ¾" oak plywood with aluminum "L" strips. When on deck you can stand on these covers. The wood rails, bathroom door and tiller that were on the boat were sanded, and then varnished. There is anywhere from 6 - 8 coats of varnish on each piece of exterior wood on the boat.
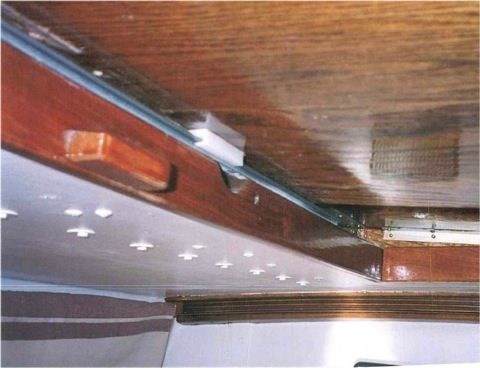
A new slider replaced the pop top
I did not like the condition of the Formica tabletop so a new wood top was made along with a new countertop. The countertop now extends across where the bench was to the left of the sink. Left over pieces of wood was configured to make storage bins across the back of the tabletop and countertop. At this time we also replaced the starboard berth decking as it had started to rot out. Cost for hatch covers, woodwork, varnish, stain, brushes, sandpaper and cleaning materials was approximately $450.00 plus two old sheets used for wiping.
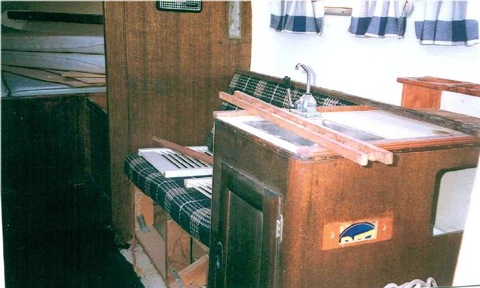
Interior when we bought the boat
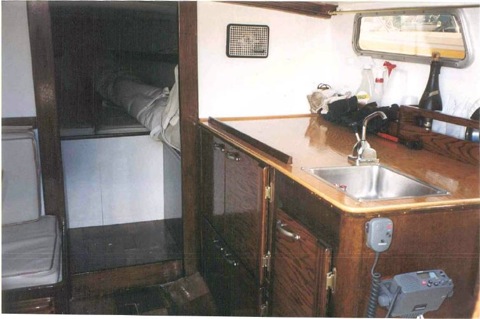
The new interior
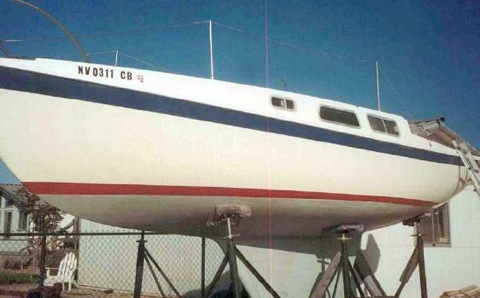
While working on wood pieces in the garage during the evenings, I started painting the red stripping on Soulmate during the day. I woke up one Sunday morning, measured out, taped off and painted a vertical red "V" on the sides in the center of the hull of the boat. I hope I don't offend any Cal owners with this design. There are 4 coats of Interlux Brightside paint on this design. The paint contains Teflon and its' deep color does vary from dye lot to dye lot, just a warning. While trying to refurbish the gel coat, we discovered lots of minor dings and spider cracks. "Hattress off white" topside paint was used on the sides of the hull, and deck. Two quarts of red and 2 quarts of white paint (well 3 of red due to the "video moment" when Randy went to rest his arms on the ladder and sent a quart of red paint tumbling in the air) along with brush cleaner and cleanser #333 run right at $100.00.
Hanging the boom, tiller and traveler support from the rafters in the garage proved to be a great way to apply finishing material. After sanding the boom, I walked into the garage one night and got out the paint. Cliff at the sail loft encouraged me to do my thing; the red boom looks awesome.
Soulmate's floor needed fiberglass work and I then checker-boarded it with white and brown paint and an overlay of stain. The pattern and finish camouflage the fiberglass and wood joints and it looks great, like an aged but well kept parkway floor. We chose to move the traveler from in front of the companionway to behind the tiller. Made a wooden "V" out of a 2" x 8" piece of red oak to attach the traveler track to. It straddles the seat behind the tiller. The traveler car has ¼" continuous line running through it, using 2 blocks and 2 clam cleats with bull-eyes to keep it in place. Harken's catalogue was a great help in making the mainsheet along with the boom-vang, cunningham and outhaul system. Cost for the mainsheet and traveler was around $300.00. The boom-vang, cunningham and outhaul were about $175.00 thanks to Minnie's and Steve. To repair the ruder Randy had to get the vertical bow out of it. By laying it on its' side with a 25 lb lead brick on it for several weeks, the ruder slowly was reshaped. After reshaping, the same process used on the hull and keel was applied to the ruder, sanding, epoxy filling, sealing, and painting.
For the electrical equipment we selected Raytheon products, because of their response to inquiries we had made. Depth finder, boat speed, wind gauges and VHS radio ran us $875, which included a 10% discount for opening a charge with West Marine. The only problem we have found with our ST-40 series equipment is that no where in any literature does it tell you, that you need a 3rd component to get "true wind speed". It appears the additional cost for this apparatuses with cables is about $47.00. Display gages are mounted on the port side of the exterior of companionway. Depth and speed sensors are installed in the hull just under the forward sleeping berth. To do this we had to cut out the water storage tank. To mount the wind instrument, a Windex, antenna and running light Steve found a bracket made out of stainless steel to fit on top of the mast. New electrical wires and cable for the antenna were run inside the mast and through the deck. A steaming/foredeck light was added. Cost for the Windex, lights, cable and antenna about $140.00. The port side of the rear bulkhead was disintegrating. It was rebuilt and a bracket for the new battery was made. Battery and trickle charger cost $170.00.
Finding a 6 horsepower, 4-stroke motor with a long shaft was a bigger chore than what we expected. Six weeks later, with the help of Boater's World, a week before we launched, we had a Nissan Motor. It cost us $1495.00 and works fine. We ran the gas supply under the starboard side of the cockpit. A small hole drilled through the side of the interior of the deck with some self-rigged fittings and a hose provides fuel to the motor, thus cleaning up the cockpit area.
I wanted an extra jib halyard - heard and read about too many horror stories of jams, runaways etc - ended up with 2 extra so we also have a topping lift. We ran one halyard on the rear side of the mast and one on the front. To avoid conflict with the main halyard when raising the sail, position the upper block for the topping lift on the rear side of the mast slightly off center, approximately ½ way between the height of the main sail when raised and the top of the mast. After rigging the mast, we ran routing blocks on the deck, added power clutches, 2 winches and replaced all the tracks. The track on the boat must have been the originals and finding Genoa leads that fit snugly was difficult. (The old track worked great for the new wood hatches that we made. The rear hatch slides under the front hatch on Teflon guides. We mounted the track on the wood rails and then screwed and glued the Teflon slides to the underside of the hatch cover.) The cost for halyard lines (60 feet of 5/16"line for each new halyard and 30 ft each for main and jib halyard), track, clutches, blocks, cleats and shackles was approximately $750.00. (The winches were given to us in exchange for the winch on the mast.) Two jobs that are fun in December with the cold and wind are installing a new rub rail and new lifeline covers. Seals and Spars sold us the rub rail and although the old one came off easy enough and the new one went on well it is hard to stretch in the cold. It will be re-stretched in the spring. As for the lifelines, a knife and elbow grease removed the old one. A new rub rail and lifeline covers cost $270.00.
Well now we are ready for final finishes. Don't waste your money on cleaners for the mast. Elbow grease worked. We then waxed it and called it a day. We secured all nuts, bolts and washers and cut them off, installed hooks to hang extra lines and sail ties on, purchased jib sheets, fenders, dock lines, anchors, life jackets, personal safety cushions, winch handles, a porta potty, rugs, first aid kit, cotter pins, clinometer, flashlights, assembled a parts and tool box, put red numbers and Cal 25 logo on the mainsail and repaired the headsails (by hand). Probably spent another $600.00 along with $225.00 for Genoa leads, $140.00 on tires for the trailer and $85.00 on a light kit for the trailer. Launch day made it, Dec 29, 2001. It was dreary and drizzling. Backing Soulmate into the water wasn't as easy as we expected. She didn't want to float off. On the third try the boat trailer was removed from the truck and a small 2- wheeled dolly was attached to it. Soulmate raced into the water and was guided to a safe haven. Randy started her motor and took her to her new home- slip # 47 on dock B.
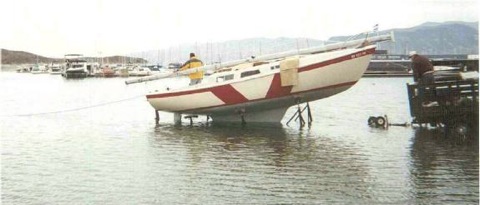
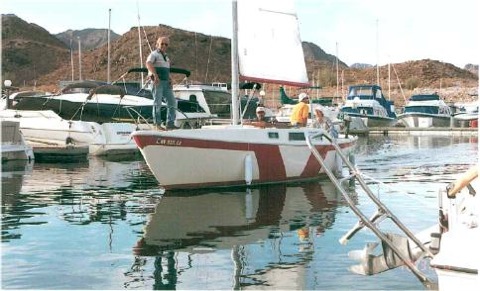
Soulmate is Launched
It was now dusk. After joining the electrical wires from inside the mast to the deck and straightening out halyards and shrouds the mast was raised and stanchions were tensioned. With 2 cabin cruisers on her bow and one to her port Soulmate held her head proud. The next day we attach the bright red boom, did some adjusting and put up the mainsail. In ecstasy and awe, with grins from ear to ear, we thanked all that helped and supported us. We christened Soulmate on our maiden voyage with her. I smiled as she frolicked in response and promised her many fun filled adventures.
The Maiden Voyage of Soulmate.
Much thanks is owed to Nancy Cox who wrote the story of the restoration of Soulmate and contributed the pictures for the Cal 25 communitiy to enjoy.