Tim Zeug’s Restoration
My name is Tim Zeug I’m a Cal 25 owner in San Pedro, CA. The boat's Hull #827
I replaced The Beam and Deck in my boat. I used the methods I got off this site in the article Annapolis Cal 25 owner Dave Godwin wrote about. I made a few changes that suited me. Overall it is the same. I just added pictures.
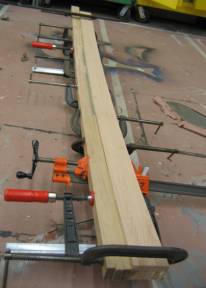
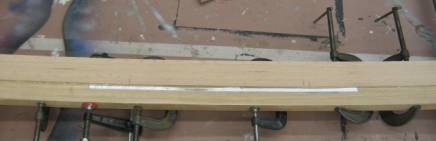
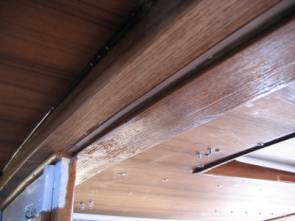
First I made the Beam. I decided to use oak instead of the plywood method Dave used. I didn’t bend the oak I cut curved pieces out of 1x6’s 8feet and glued them together to get the width I needed. I found that the Radius of the Curve is 32 feet. Make note of that dimension I couldn’t find it in any publication or spec sheet. I got it by reconstructing part of the boat in a Cad program. It fit like a glove. I added some additional strength by laminating a ½” aluminum rib in the center of the beam over the area that spans the companionway.
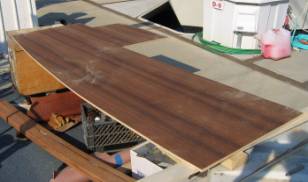
For the new deck and the ceiling inside I used 2 sheets of 1/2" marine grade Teak plywood. This was the wrong thickness. The Factory thickness appears to be 3/8. The ½” gave me no problems. I used Teak because. I didn’t want to use the bi-axial cloth on the interior ceiling side of the plywood and I replaced all the wood around the hatch and anything on the deck with Teak bur most of all I didn’t like the like the way the Mahogany ply looked. The oiled Teak with all the Stainless Steel screws and bolts coming threw looks really rich and it doesn’t look bad with the test of the original Mahogany interior.
As Dave mentioned the boat seems to build around a 4 x 8 sheet of plywood both economical and handy. Don’t go too crazy trying to get tolerances tight. Keep them wide and use fiberglass fillet bonds to hide the gaps. Much easier and better looking.
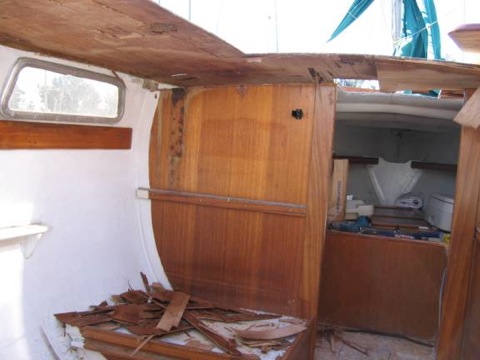
I had to remove the mast beam. This was the most difficult part after removing the chain plates. I used a sharp chisel and cut the fillet bond on the beam on the forward upper side. I had to use a Saws all to cut the beam free from the fiberglass deck/old plywood/old headliner you name it was quite a job. It appeared that when they made the boat when it was upside down in the factory all the resin they used to bond the wood to the upper deck all pooled in the areas where the mast step is. Cutting out the beam was cutting through solid resin I wanted to replace the piece of wood in the mast step but after a close observation I decided it was OK and with all that resin around it I would have never got it out anyway. TZ06.jpgAs far as the overhead once I removed all the topside hardware it literally fell off (It needed to be fixed badly) the linoleum scrapper was indeed a pivotal tool (thanks Dave) to remove what was left some of the more difficult spots I used a big wood chisel. I got lucky with the old bi-axial cloth it came out in one piece so I used that as my pattern to cut the new overhead pieces.
When you are ready to put the new plywood in, set the Skill saw blade to approximately 1/4" (or less) depth and score the deck-side of the new pieces of plywood in fore and aft lines about 6/8" apart. This will help adhesion of the wood to the Fiberglas. Mix the West System 105 epoxy with the 206 Slow Hardener (you'll appreciate the working time) with plenty of 406 Colloidal Silica make the mixture thick otherwise you be wearing it. (Your mixing stick should remain vertical if you let go) Use a vinyl-flooring trowel with ridges to spread the mixture on. Should be just like applying flooring. You need quite a bit of the Silica I went to a place that makes boats and bought CABOSIL instead of the 406 silica. A brown grocery bag FULL cost me $3.50 I used all of it! Cabosil is powered glass so no you don’t want to breath it. I also used another additive that I don’t remember the name of. It keeps the resin from getting brittle with all the Cabosil in it. All the additives cost me less than $20.00 that’s a lot less than the 406 will cost you. As far as the quantities I used 2 gallons of resin total. For each side of the overhead I mixed up about 2/3 of a gallon of resin and put the equivalent of 2 large containers of 406 silica in the resin so you see how it adds up 6 to 8 containers of 406 silica is a lot I also used an equal amount to make fillet bonds around the edges the west system fill able caulking tubes were excellent for this.
Prior to installing the overhead, you will need a large stock of 2X4's. These need to be cut to individual lengths for propping/applying pressure from the underside after the deck. Make them so that you will whack them into place with a maul. I strongly recommend cutting all the required struts and doing a dry run with all of these prior to putting the epoxy on. Use as many clamps as you can lay your hands on around the windows and hatches Cut square pieces of plastic to use where ever you clamp and/or prop to keep any excess epoxy from bonding your clamps to the overhead plywood. Get lots of rubber gloves. Anyway, when you are ready to glue everything into place.
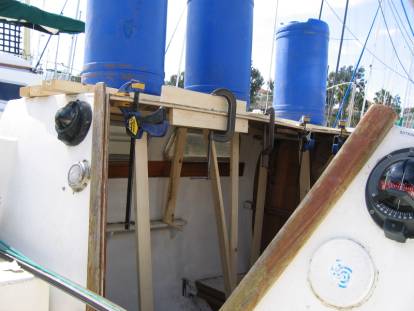
Here’s a tip for applying counter-pressure on the top of the deck. Obtain 4/6 large trashcans (30 gal?). Place them strategically on the deck and fill them with water. When you're done. Just empty them over the side. I've seen people lug cinder blocks, bags of rocks, bags of sand onto the boat to get weight up there.
The other way is to take everything out of the boat, flip it upside-down and set it on two large sawhorses. Everything ends up being at waist-level. Anyway. But nobody could tell me the best way to flip a boat over on land. This was not that difficult to do just mix lots of thickener in the epoxy so it doesn’t drip on you.
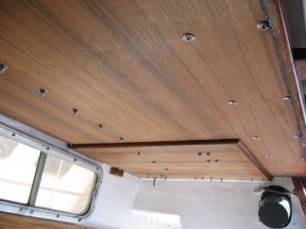
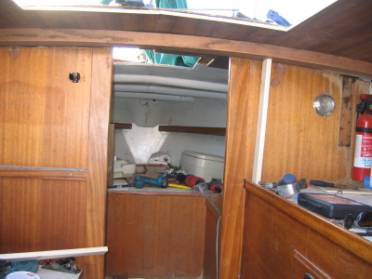
The finished product looks very nice I went the extra step and replaced all the topside rigging so I was able to use a plastic syringe and fill all the old mounting holes on the topside with epoxy so if there was a void or some ware that the epoxy I toweled on wasn’t adequate that took care of it. I think that is a good idea you have to redrill the mounting holes anyway.
Good luck,
Tim Zeug